

How To Draw A Candle
This tutorial shows how to draw a burning candle with melting wax in six steps. It provides easy drawing examples and simple instructions.
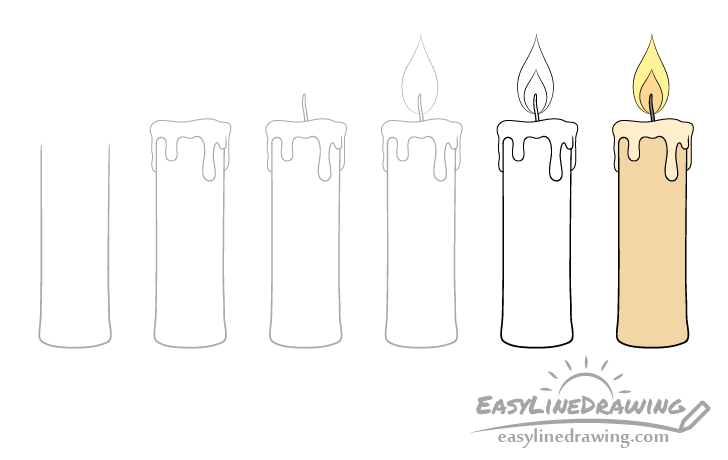
You can run into a preview of the drawing steps for the candle in the analogy above.
It's recommended that you outset the tutorial in pencil and make light lines that you can easily erase in case y'all make a mistake. You might also want to take a black pen or maker to trace over them later on.
Pace 1 – Draw The Candle Stick
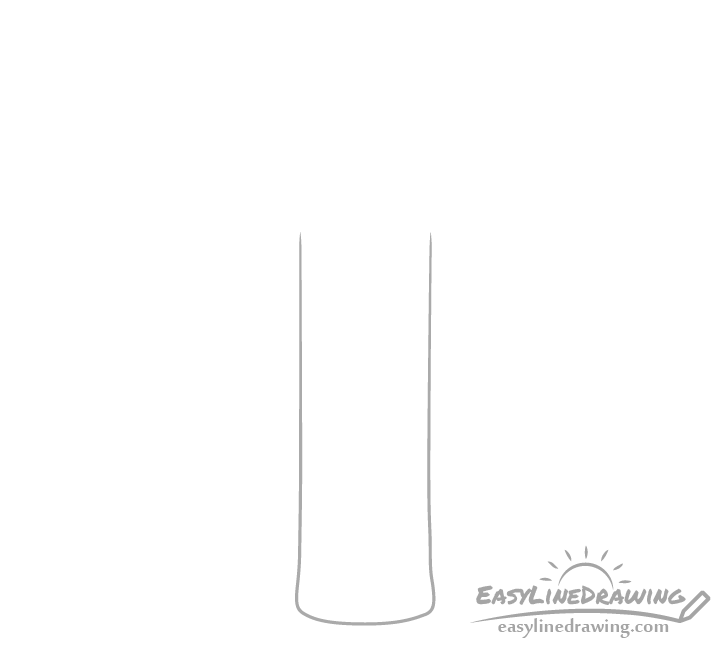
Begin the drawing with the candle stick. Candles can some in many shapes and sizes but in this case it will be a fairly "tradition" candle that is no very tall. Start by cartoon two vertical parallel lines, adjacent make the candle a lilliputian wider towards the bottom and outline the bottom itself with a curve.
Leave the tiptop part open for the wax that will exist added in the adjacent stride.
Step 2 – Draw the Melting Wax

At the top of the candle stick add the melting wax. Outset draw the very acme with an uneven wavy line to show that it's melted. Next add some wax dripping down the sides. Attempt and depict each of the drips to be somewhat dissimilar in length and size so that they looks more natural.
Pace 3 – Draw the Wick
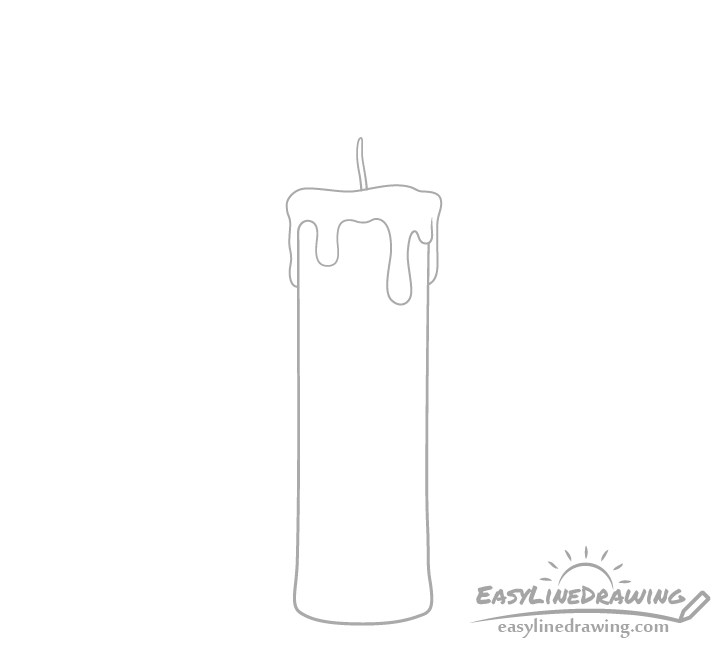
Going up from the middle of the candle add the wick. Go far fairly thin and draw it with a bit of a wave in it'southward overall shape.
Stride 4 – Draw the Flame
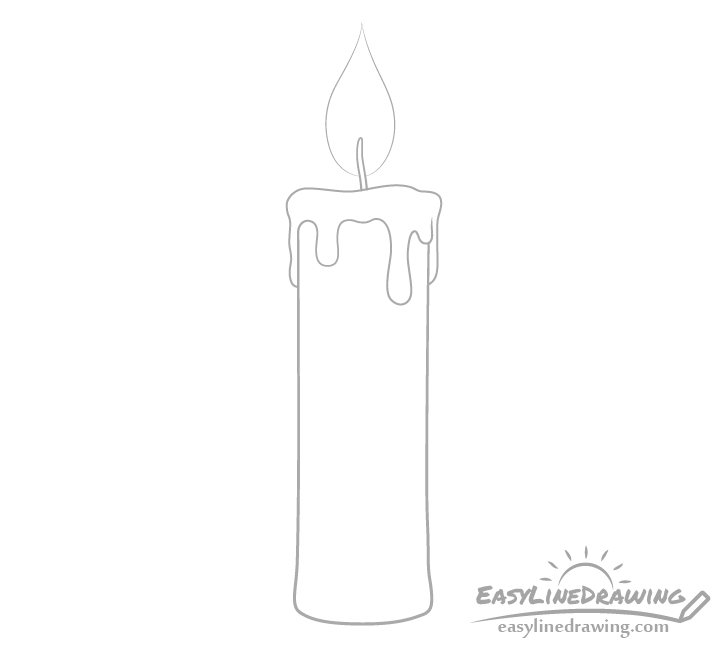
Coming up from the wick add together the flame. Draw it wider and rounder at the lesser and narrower as information technology goes towards the top ending with a pointy tip.
Step 5 – Cease the Line Drawing
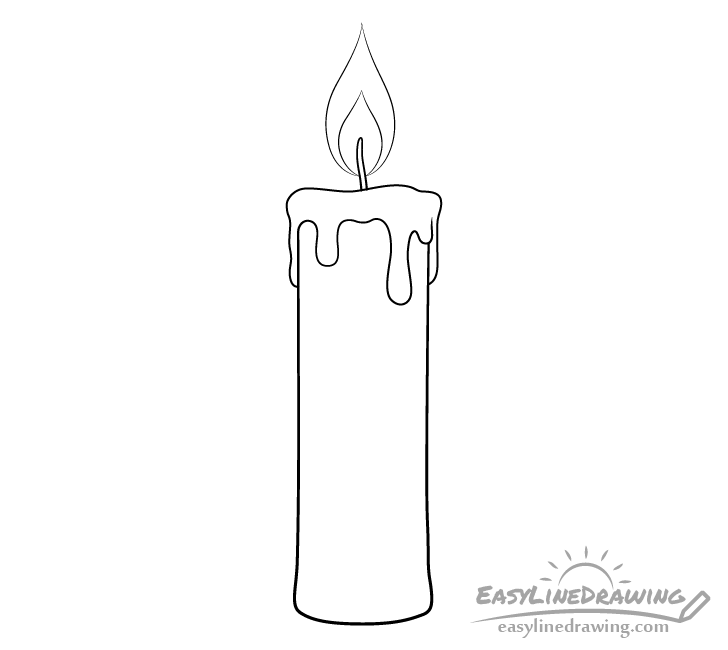
To cease the line cartoon offset add the inner role of the candle flame. Make this similar in shape to the outer part but smaller.
Side by side (as was mentioned at the star of the tutorial) trace over your drawing with a pen or thin black marker. If y'all don't have those handy you tin also simply darken your lines with the pencil.
Too when going over your lines try and go along the ones around the flame thinner than for the remainder of the candle. This volition go far announced lighter and more than like an bodily fire.
Step half dozen – Color the Candle
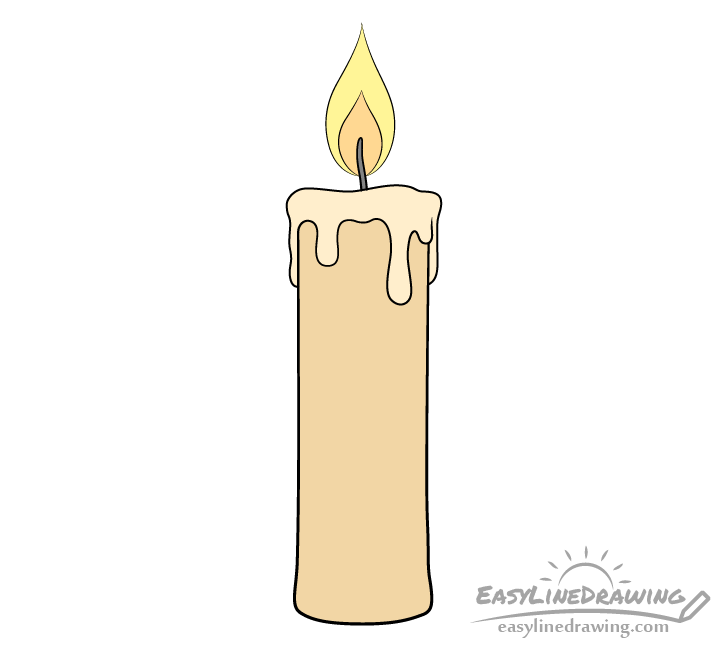
You can finish the drawing by coloring the candle. A adept mode to do this is with paints or colored pencils every bit markers may be likewise bright.
Make the candle stick a light yellow/brownish and the melting wax the same color only slightly lighter. If you are coloring with pencils you tin first go over the cartoon with one colour and then the other. If you lot are using paints you lot tin merely mix these together. You may also want to add together a bit of orangish to whatever option you choose).
You can make the fuse a dark grey, the inner role of the flame orange and the outer part xanthous. In one case done you should have a finished drawing of a candle.
Conclusion
Cartoon a simple candle such as the 1 in this tutorial is fairly piece of cake. By calculation merely a bit of item like the melting wax you can besides make it look more interesting than if y'all were to just draw a evidently candle stick.
If y'all enjoyed this tutorial and are interested in trying a few more like it besides come across:
- How to Depict a Light Seedling Step by Stride
- How to Depict the Sun in Different Means
- How to Draw a Rocket Step by Step
- How to Drawn an Envelope Step by Footstep
- How to Draw a Traffic Light Step past Step

Source: https://www.easylinedrawing.com/how-to-draw-a-candle-step-by-step/
Posted by: rodriguezsument.blogspot.com
0 Response to "How To Draw A Candle"
Post a Comment